
Wouldn't it be fun to make your own cupcake paper liners? I have developed a technique that shows you how to do just that. For making these cups you will need molds. Cupcake molds are now available in my Etsy store. Click here for buying mold. If you like you can buy a DVD that shows you how to make the cupcakes as well. DVD with molds
The molds I make can withstand the heat from the oven and can be baked over and over again.
You will need the following:
A cupcake mold available here Etsy
Liquid Fimo
Chalks in colors of your choice + white to make it a bit more opaque . A small paint brush. This you will find in your craft store or online
Blend liquid Fimo with powdered pigments or chalk. Adjust with the white chalk/pigment powder to make it more pastel and to get it opaque.
Blend it well together with a spatula or knife.


With a small brush, dab some in the cupcake molds. Do not expect to cover it completely in first bake as it will be made in stages. Now put it in your preheated oven and bake for about ten minutes. Take it out and allow to cool a bit so you don't burn yourself. Put on another coat and then in the oven to set again for ten minutes. Do this one more time and it should be enough. (if not just put on yet another coating) Release it from the flexible mold.


Top can be embellished with gold paint or other color. Just put a small amount of paint or gold pen on paper and carefully rub the top of the cupcake liner into the paint.


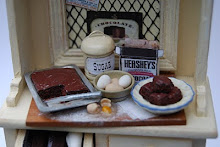
A feast of cupcakes being made in different stages. Great fun to make.


 Miniature artist Christel Jensen from Norway. I make food, flowers and other small items in 1/12 scale. I use polymer clay to make the little art objects. I also like to reconstruct furnitures and make small interior designs in a trendy vintage style. My art is sold at fairs and on Etsy.
Contact info:
Miniature artist Christel Jensen from Norway. I make food, flowers and other small items in 1/12 scale. I use polymer clay to make the little art objects. I also like to reconstruct furnitures and make small interior designs in a trendy vintage style. My art is sold at fairs and on Etsy.
Contact info:


26 comments:
Thank you so much! Your work is amazing!
oooh! awesome technique!
And I finally made my own cupcake mold too :D
thanks!
Awesome! Thank you for sharing! Two more turtorials and maybe I will find some courage to try to make miniatures like yours myself.;D
Thank you for the tutorial! It is absolutely amazing!
Muchisimas gracias por compartir tus fantasticos trabajos en forma de tutorial.
besitos ascension
grazie per il tutorial, proverò a fare questi cupakes sperando assomiglino almeno un pochino ai tuoi!
Luisa
Very clever idea Christel. Thank you for sharing it with us.
Thank you for sharing, I like the idea
Super:) Thanks for supporting feedback. You are the best! I am happy to share with you:)
AMAZING!!! Many thanks for the tutorial, Christel. Is fantastic. All your work is fantastic! Kisses from Barcelona
Thank you so much for this tutorial.
Hugs from Craftland
aMAZING!!!!! You are "une artiste" .
thanks,
Peggy from France
Thank you so much!!
wow loving all the tutorials latley, keep em coming! a macaron tutorial would b amazing <3
Love Bec <3
it's really so beautiful !!!!!!!
so beautiful
peggy
Thanks you for sharing! Very nice cakes!
Gracias por el tutorial, es muy interesante. Y felicidades por tu precioso blog. Un besito!
Thanks for sharing, very cool idea!
Hugs
Maria
Muchas gracias por el tutorial. Besos
Wow thank you for your great tutorial. It is very useful and well explained. Hugs!
Great tutorial! Thank you for sharing!
Ina :)
dette har jeg sett etter så takk skal du ha;)
oh my gosh! you are sooo smart Christel! I love it and thank you so much for sharing! you are very generous! (: xoxo
Thank you!! ;) Good idea :* :D
Thank you for such a clear explanation. Read this article to go deeper F1 Reaction Time Test. F1 Reaction Test helps you stay alert and react faster.
Post a Comment